| Available on: | Enterprise plan |
| Required role: | Workspace admin |
Single sign-on (SSO) allows for an easier and more secure way for your workspace members to access Epidemic Sound. To learn more and to get started, please check out Guide to SAML SSO. The rest of this page describes the process of configuring an Entra ID (formerly Azure AD) tenant for SAML SSO with Epidemic Sound.
Step 1: Find the SAML properties for your workspace
In the first step you need to add an application for Epidemic Sound to your Entra ID tenant. To complete this step you will need some values from your Epidemic Sound workspace.
- On epidemicsound.com, navigate to the menu at the top right of the screen and select Organization.
- Select the Identity & Provisioning tab
- Ensure at least a single verified domain has been registered to your workspace, it is a requirement for SSO.
- Click the button Configure SSO. A modal dialog will appear with the SAML properties for your Epidemic Sound workspace.
Keep the tab open, you will need the values in the next step.
Step 2: Add Epidemic Sound to Entra ID
- In another tab, navigate to your Entra ID admin dashboard
- Select Applications and then Enterprise applications
- Choose New application and then in the top menu bar select Create your own application
- Give your application a name, i.e. Epidemic Sound, and then choose the option Integrate any other application you don't find in the gallery (Non-gallery)
- On the application page, select the Single sign-on section and choose SAML. You will now be able to configure your application with the required SAML information.
- On Basic SAML Information add the following:
- Identifier (Entity ID): Paste the SP Entity ID from the SAML Properties modal window at Epidemic Sound.
- Reply URL: Paste the ACS URL field from the same SAML Properties modal.
- (Optional) Sign on URL: Construct the following URL: https://www.epidemicsound.com/sso/saml/[Tenant ID]/ where Tenant ID is the Tenant ID from the SAML Properties modal window. Configuring this is recommended as it means your users will always use SP-initiated when opening the app from their Entra ID apps dashboard. Otherwise IDP-initiated will be used.
- Click Save to save your changes
- In the Attributes & Claims section:
- Ensure Name ID Format is set to emailAddress (Unique User Identifier (Name ID): user.userprincipalname [nameid-format:emailAddress])
- Add the following claims by clicking Edit and then choosing Add new claim.
Name Source Source Attribute FirstName Attribute user.givenname LastName Attribute user.surname
- Copy the App Federation Metadata Url by clicking the Copy icon next to the text field. You will need the metadata URL in the next step. The URL will have the following format: https://login.microsoftonline.com/abc123/federationmetadata/2007-06/federationmetadata.xml?appid=abc123
Step 3: Enable SAML SSO in Epidemic Sound
In the Configure SSO modal (Identity & Provisioning tab):
- From the SAML properties step, click Next to get to the configuration step.
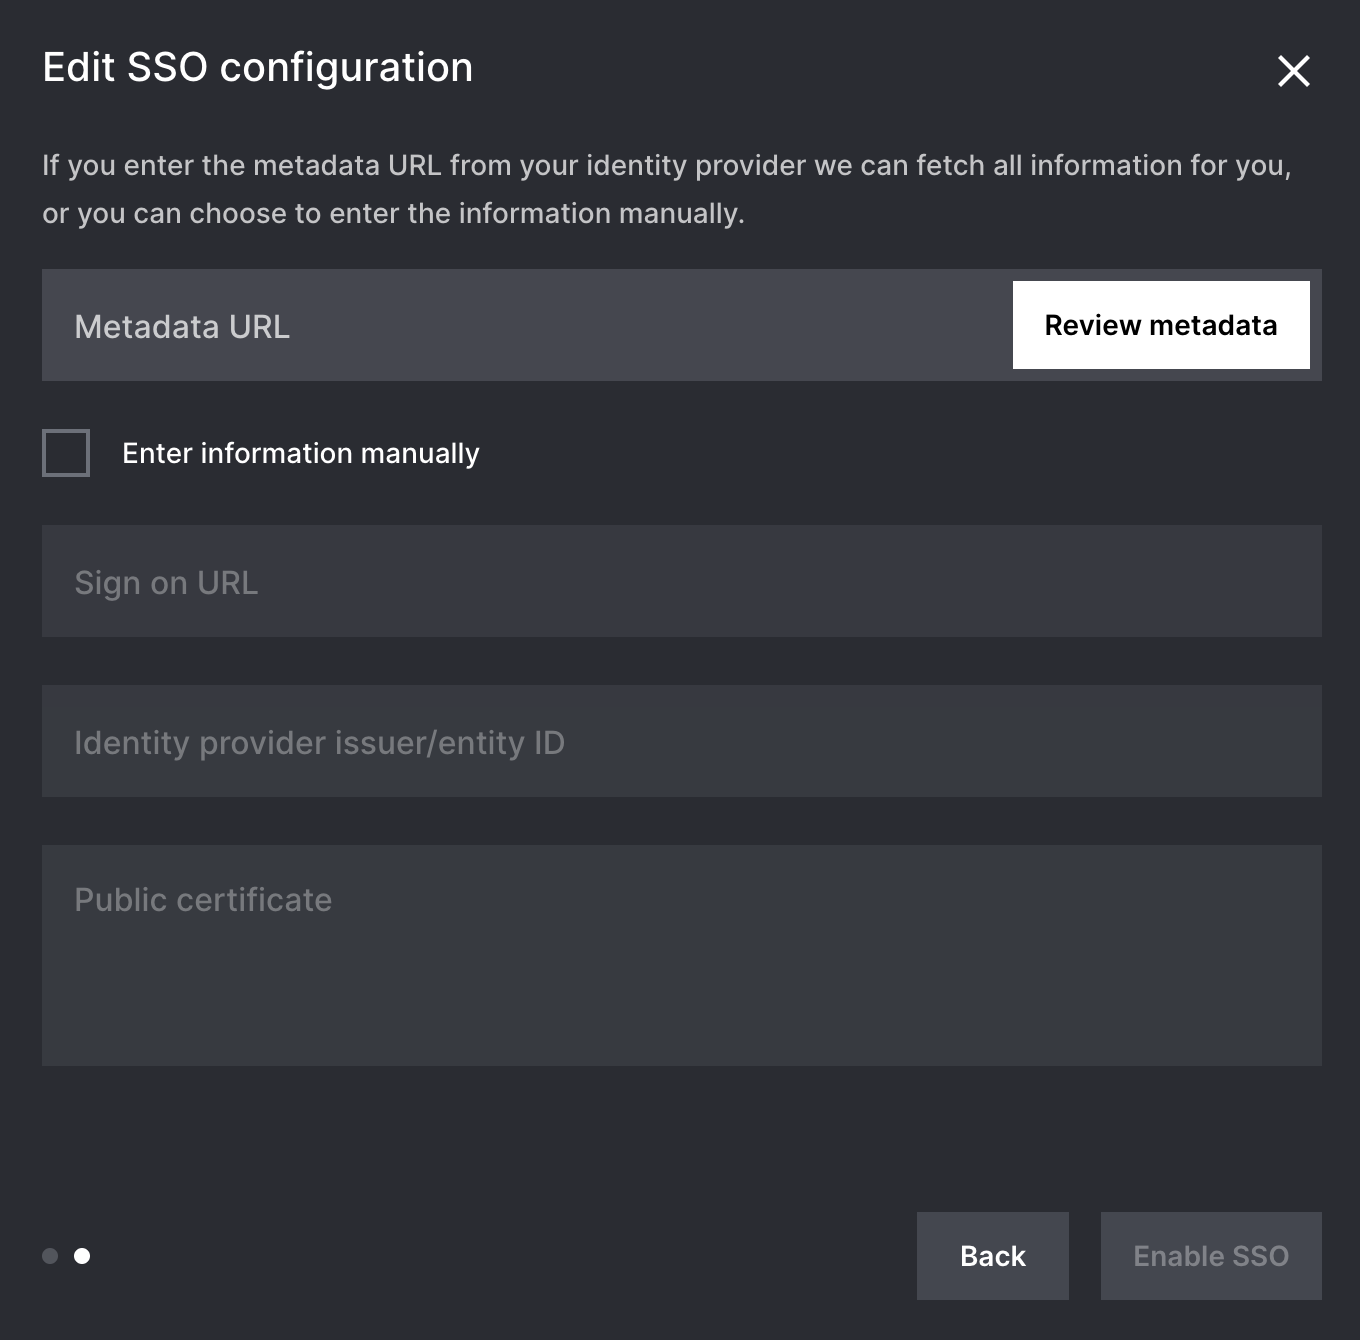
- Enter the App Federation Metadata URL (recommended) that you copied previously and click Review metadata. The metadata should be parsed and displayed below. If the parsing fails you can still enter the required information manually. The metadata URL makes it easier to update the configuration later, for example to renew certificates.
- Review that the information looks correct and then click Enable SSO. When enabled SSO will be optional.
We strongly recommend you to test logging in via SSO in an “incognito” window before requiring SSO to reduce the risk of being locked out.
Step 4: Test the SSO integration
Assign yourself to the application, then select the Test single sign-on with Epidemic Sound option at the bottom of the Single sign-on tab.
You have now configured SSO. For more details or information on how to require your members to only login with SSO, see the main SSO guide.